Showing posts with label garden. Show all posts

Friday, August 2, 2013

Kale Salad with Warm Bacon Vinaigrette

I have been trying to branch out and find new recipes for the vegetables we get in our CSA basket so we are not eating sautéed kale and swiss chard every night of the week. This recipe is one of the better ones we have found. Plus since it is made with raw kale it will hold up for a day or two in the fridge. I love recipes that make good leftovers for lunches.


Adapted from Just A Taste, serves 4

Ingredients

2 pounds kale, washed and dried
1/3 cup toasted nuts, such as walnuts, pecans or pine nuts
6 slices bacon
2 tablespoons onion, finely minced
1 clove garlic, finely minced
 1/2 cup apple cider vinegar
2 tablespoons packed brown sugar
1 tablespoon dijon mustard
Salt
Pepper
Dried cranberries, optional
Blue cheese, crumbled, optional

Directions

Remove the stems of the kale. Roughly chop the leaves into bite size pieces. Place the kale in a large bowl and top with the toasted nuts.

Cook the bacon in a large pan over medium heat. Transfer the bacon to a paper towel-lined plate to cool. Reserve approximately 3 tablespoons of the bacon drippings in the pan.

Return the pan with the bacon drippings to stove. Add the onion and garlic, saute for about 1 minute, until soft. Whisk in the vinegar, mustard and brown sugar, make sure to scrape up any brown bits on the bottom of the pan.

Remove the vinaigrette from the heat and season with salt and pepper.

Chop up the bacon and add it to the bowl with the kale and nuts. Toss the kale with the warm dressing. Top with the cranberries and cheese, if desired. Serve immediately.

♥  Amy

Friday, January 25, 2013

Roasted Tomatoes

Normally I try to can a large batch of tomatoes every fall. This fall we were just too busy to do an epic canning session but I still needed to store the boxful of tomatoes we harvested from the garden. I saw this recipe online and new it was the perfect lazy solution!

(I was even lazier about blogging... hence why this is only just getting posted in January...)


Once roasted, the tomatoes can be stored in the freezer and pulled out as required for soups and pasta sauces.

Adapted from David Lebovitz

Ingredients

2 tablespoons olive oil
1 clove garlic, chopped
8 to 10 branches fresh thyme
Spring fresh rosemary
Salt 

Pepper
1 pound tomatoes


Directions

Pour the olive oil into a shallow non-metallic baking dish. Add the garlic, thyme, rosemary, salt and pepper.

Cut the tomatoes in half horizontally and remove the stems. Toss the tomatoes in the oil and herbs. Lay the tomatoes cut side down in the dish.

Bake for two hours or until the tomatoes start to wrinkle.

Store in a ziploc bag in the freezer for up to six months.

♥  Amy

Friday, October 26, 2012

Crunchy Kale Salad

This salad is one of those power house salads that is a meal on its own. Especially if you added diced chicken. I also often add hemp hearts or flax seeds.

This salad, with the exception of the avocado, will last an amazingly long time in the refrigerator so don't be intimidated by the large batch size. It will provide several days worth of lunches - always important in our house.


Adapted from Use Real Butter, serves four to six

Ingredients

4 cups kale, shredded
2 cups red cabbage, shredded
2 cups green cabbage, shredded
1 Granny Smith apple, julienned
1 avocado, diced
1 cup almond slivers
1 cup dried cranberries or raisins

1/2 cup orange juice
1 tablespoon maple syrup
3 tablespoons tahini
1/3 cup olive oil
2 tablespoons lemon juice
Pinch of salt, to taste


Directions

Place the orange juice, maple syrup, tahini, lemon juice and salt in a medium bowl and whisk together until blended. Slowly drizzle the olive oil into the bowl while whisking constantly. Set aside.


In a large bowl, combine the kale, cabbage, apple, avocado, almonds and cranberries. Pour the dressing over the salad and toss until well coated. 


♥  Amy

Monday, July 16, 2012

Sprouts

Sprouts are so versitile... they can be added to sandwiches and salads for extra protein and a little zip.

There is a long list of beans or seeds that can be sprouted: adzuki bean, alfalfa, fenugreek, mung bean, pea, chick pea, soybean, wheat, corn, rice, quinoa, amaranth, sesame, sun flower, broccoli, radish, watercress, mustard, arugula, clover, lentil... Look in the bulk section at your local organic food store. In Calgary, try Community Foods - they even sell pre-packaged mixes specifically for sprouting.

Ingredients

1/2 cup of dried beans or 2 tablespoon of dried seeds
Water
Glass Jar
Cheesecloth or mesh

Directions

Rinse the beans thoroughly to remove any dirt. Place the beans or seeds into the jar and cover with about 1 cup of water. Place the cheesecloth or mesh over the mouth of the jar and secure with the jar ring, rubber band or string.


Allow to soak in a dark location at room temperature for 8 to 12 hours for beans and 2 to 4 hours for seeds.

Drain the water from the jar. Rinse the beans or seeds with fresh water, completely drain the water. Recover the jar and prop upside down inside a small bowl. Return to the dark location.

Continue to rinse the beans at least twice a day for 3 to 5 days, until they have reached the desired size. They can be exposed to indirect sunlight for the last day if greener sprouts are desired.

Rinse the spouts thoroughly and remove from the jar.

Eat immediately or store in the fridge.


♥  Amy

Monday, March 26, 2012

Sunday, March 4, 2012

In the Garden: Starting from Seeds

There maybe several centimetres of fresh snow on the ground but I am beginning to notice the first signs of spring. It is now light out when I leave for work in the morning and when I leave work at the end of the day. And most importantly...


There is still twelve weeks until we will be able to start planting outside but this past weekend I decided to start the tomato seeds.


Once again this year we will be growing:

Pineapple

Green Zebra

Federle

Purple Cherokee

Speckled Roman

Orange Banana

Ida Gold

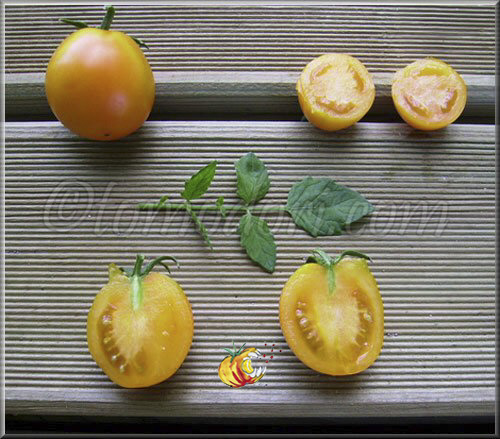
We had so much success with the heirloom tomato seeds from Tree & Twig, that I couldn't resist ordering more. So this year we will also be trying:

Clear Pink

Garden Peach

Yellow Ping Pong

Beefsteak

Black Plum

With our interior renovation slowly coming to an end, we have big plans for the backyard and garden this year. I can't wait to get outside and get my hands in the dirt!

♥  Amy

Saturday, December 3, 2011

Pumpkin Puree

I was quite surprised to return home after a five week vacation to find that the tiny pumpkins from our garden had turned beautifully orange and were showing no signs of rot. So I decided to try making my own pumpkin puree. Now I just need to decide what to make with it...


From Martha Stewart

One or more fresh pumpkin

Preheat oven to 400 F. Cut off the pumpkins stem and cut in half lengthwise. Remove the seeds with a spoon. Place the pumpkins on a large baking sheet, cut side down. Roast for about one hour or until tender. Remove from oven and allow to cool.

Pull the skin off the pumpkin or scoop out the inside flesh. Place the pumpkin flesh inside a blender or food processor and blend until smooth.

Line a colander with a double layer of cheesecloth. Transfer the pumpkin puree into the cheesecloth. Allow to drain for at least four hours or until firm.

Store the prepared puree in the refrigerator or freezer.


Amy


Tip: Instead of cheesecloth you can use paint strainer bags that can be purchased from your local paint store. They are typically plastic which means they can be easily washed and reused!

Friday, October 28, 2011

Tomato Chile Jelly

I have been madly searching for ways to preserve our beautiful heirloom tomatoes because our plants are producing faster than we can eat this year.


From Forgotten Skills of Cooking by Darina Allen


18 ounces tomatoes, peeled and chopped
2 to 4 red chiles
4 cloves garlic
1 inch piece fresh ginger, peeled
2 tablespoons fish sauce
1 1/4 cup sugar
1/2 cup apple cider vinegar

In a food processor, puree the chiles, garlic, ginger and fish sauce until smooth. Transfer the puree to a large saucepan and add the sugar, vinegar and tomatoes. Bring to a boil, stirring constantly. Cook gently for 30 minutes, stirring occasionally, until thickened. Remove from heat.

Transfer to sterilized jars. The jelly can be eaten immediately or processed for 10 minutes in a boiling water bath.


Amy

Tuesday, October 25, 2011

Roasted Vegetable Tart

With the green tomatoes gone - time to move on to the ripe tomatoes. We had the most amazing crop of heirloom tomatoes this year.

This recipe is a little complicated for your average weeknight but is oh so delicious.

From ecurry, serves two


1 16 ounce can chickpeas
1/4 cup sun dried tomatoes, drained
1 clove garlic
1 tablespoon extra virgin olive oil or the oil from the sun dried tomatoes
1-1/2 teaspoons lemon juice
1 tablespoon tahini


1 medium red onion, thickly sliced
2 leeks, sliced
2 zucchini, sliced
2 medium tomatoes, sliced
6 cloves of garlic. minced
sea salt
freshly ground black pepper
red crushed pepper
1 tablespoon olive oil

2 cups all purpose flour
1/3 cup olive oil
1/4 cup club soda
1 teaspoon salt
freshly ground black pepper
1 teaspoon basil
1 teaspoon oregano

1/4 cup grated parmesan cheese or crumbled feta cheese
Balsamic vinegar

Preheat oven to 400 F.


Combine the chickpeas, sun dried tomatoes, garlic, oil, lemon juice and tahini in a food processor. Process until smooth. Set aside.

In a large bowl, whisk together the olive oil, salt, herbs, crushed pepper and garlic. Add in the vegetables and toss to coat. Grill the vegetables on a cast iron grill or barbeque or place all of the vegetables in a single layer in a baking tray and roast in the oven for 30 minutes.
In a bowl combine the flour, salt, black pepper and herbs. Whisk together club soda and oil until well combined and then pour into the flour mixture. Stir with a fork until the mixture forms starts to form a dough with no dry flour left. If it is too dry, add more club soda or water. Gently work with your fingers until a consistent dry dough.

Divide the dough into two parts and roll gently between two sheets of waxed paper into a rectangle. Prick the crust with a fork. Bake the crusts on a parchment lined baking sheet at for about 12 minutes or until golden.

Spread about 1/2 cup of hummus on each crust. Arrange the vegetables on the top of the hummus. Sprinkle with cheese and drizzle with the balsamic vinegar. Bake the tart in the oven for a couple minutes, just enough to warm though and melt the cheese.


Amy

Thursday, October 20, 2011

Green Tomato Gratin

A little more original and refined than the traditional fried green tomatoes. I was actually surprised how the freshen and tartness of the tomatoes lent itself so well to the creamy gratin.

From No Recipes, serves 4


1 pound green tomatoes, sliced 1/8″ thick
1/2 cups breadcrumbs or panko
1/4 teaspoon kosher salt
1/4 teaspoon black pepper
1 tablespoon olive oil
1-1/2 tablespoons butter
1 large shallot, minced
2 teaspoons flour
3/4 cup heavy cream
1 teaspoon kosher salt
1/4 cup parmesan cheese, grated
1/8 teaspoon nutmeg


Preheat over to 450 F. Lightly oil a casserole dish.
In a small bowl, combine the breadcrumbs, salt, pepper and oil olive. Stir to combine. Set aside.
In a small saucepan over medium heat, melt the butter. Add the shallots and sauté until fragrant. Add the flour and cook for about one minute longer. Whisk in the cream, ensuring all of the flour is broken up. Add the cheese, salt and nutmeg. Continue whisking until well combined. 
Dip the tomato in the white sauce and arrange in the casserole dish. Spread the remaining sauce over the tomatoes. Sprinkle the breadcrumb mixture over the top. 
Bake for 10 to 15 minutes or until the sauce is bubbling and the breadcrumbs are browned. 


Amy

Saturday, October 15, 2011

In The Garden: Harvest

This past weekend we threw in the towel and harvested the last of our garden. Our yard now looks quite sad - all bare and ready for winter.

Brussel Sprouts

Carrots and Parsnips

Pumpkins

Tomatoes

We ended up harvesting a large box of tomatoes - half are still green but we have several pounds that are ripe and ready for eating. We have more than we will ever be able to eat or can so drop us a line if you would like some garden fresh tomatoes for yourself!


Amy

Green Tomato Pickles

This year I didn't have the time or patience to wait for my box of green tomatoes to ripen so I decided to do something different - eat them! 


Making green tomato pickles is essentially the same as making traditional dill pickles. The best part - the acid from tomatoes and vinegar mean that a boiling water bath is not necessary.

Adapted from Williams Sonoma: The Art of Preserving, makes 6 quart jars

2 1/2 pounds green cherry tomatoes
2 cups cider vinegar
4 cups water
1/2 cup kosher salt
12 bay leaves
2 tablespoons picking spice
6 cloves garlic
6 teaspoons dill seed
6 teaspoons dill
3/4 teaspoon celery seeds

In a sauce pan, combine the vinegar, water and salt. Bring to a boil, stirring to dissolve salt.

In each jar place 2 bay leaves, 1 teaspoon pickling spice, a garlic clove, 1 teaspoon dill seed, 1 teaspoon dill and 1/8 teaspoon celery seed. Pack the tomatoes into the jars leaving about 1 inch of room at the top of the jars.

Ladle the boiling brine into the jars, leaving 1/2 inch of headspace. Wipe the rims clean and tightly seal the lids.

Let the pickles sit for at least two weeks to allow the flavours to develop.


Amy


Thursday, October 13, 2011

Kim Chi

Kim Chi is the spicy Korean version of sauerkraut. It is served as a condiment with most Korean dishes.

It is traditionally done with Napa cabbage but I used the standard green cabbage from our CSA baskets. If you can not find the Korean chili powder (gochugaru) you can use Chili Garlic Sauce.


Adapted from Mark's Daily Apple

3 pounds cabbage
3/4 cup kosher salt
8 to10 cloves of garlic, peeled
4 inch piece of ginger, peeled and roughly chopped
3 tablespoons fish sauce
1 tablespoon honey
1/2 to 3/4 cup Korean red chili powder
8 to10 scallions, chopped into 1 inch pieces

Cut the cabbages lengthwise into quarters and then across into 1 inch thick ribbons. In a big bowl, dissolve the salt in 8 cups of cold water. Transfer the cabbage to the bowl and use your hands to toss it in the salt water. Cover the bowl with a towel and leave it to rest for 6 hours to overnight.

Remove the cabbage from the salt water and squeeze out as much moisture as possible from the leaves.

Combine the garlic, ginger, fish sauce and honey in food processor and blend until very finely minced. Stir in the chili powder.

Combine the green onions, cabbage and spice mixture, mixing well to coat all the cabbage leaves. Divide the cabbage into quart canning jars, pressing down firmly to remove any air bubbles. Seal the jar with plastic wrap and an elastic band. Let sit at room temperature for 72 hours or longer to ferment. Once fermented to your taste it can be stored in the refridgerator up to 3 months.


Amy

Saturday, September 24, 2011

Zucchini Cake

I made six batches of this in one go in order to deal with the abundance of zucchini in our garden. I had attempted to make a paleo version but it was a failure so I resorted to the traditional recipe.

Adapted from Martha Stewart, makes one loaf or 12 muffins

1/2 cup butter, softened
1 cup sugar
1 large egg
1/2 teaspoon salt
1/2 teaspoon vanilla
1 cup zucchini, grated and drained
3 tablespoons sour cream
1 cup flour
1/4 cup cocoa powder
1/2 cup pecans or walnuts
1/2 cup chocolate chips

Preheat the oven to 350 F. Spray the loaf pan with vegetable oil.

In the bowl of a stand mixer, cream the butter, sugar, salt and egg until combined. Add the vanilla, zucchini and sour cream. Incorporate the flour and cocoa powder. Stir in the walnuts and chocolate chips.

Transfer the batter to the prepared loaf pan. Bake until a toothpick inserted into the loaf comes out clean, about 25 minutes.


Amy

Wednesday, September 21, 2011

Rhubarb Chutney

Chutneys are one of my favourite condiments and a standard of our fall canning regime. Normally I do peach chutney but this year I was inspired by a recipe I saw for rhubarb chutney.

Chutneys also make an excellent marinade or sauce for grilled chicken.


Adapted from Deanna's Daughter, Makes 8 to 10 Half-Pint Jars


8 cups rhubarb, roughly chopped
6 cups onion, diced
2 cups raisins
4 cups brown sugar
4 cups cider vinegar
2 teaspoons salt
2 teaspoons cinnamon
1 teaspoon nutmeg
3 teaspoons pickling spice

Place the pickling spice into a square of cheese cloth and tie into a bundle. In a large heavy bottomed pot, combine all of the ingredients including the bundle of pickling spice.

Bring to a boil over medium heat, stirring constantly. Simmer for an hour to thicken.

Sterilize and prepare the jars.


Ladle the hot mixture into the jars, leaving 1/2 inch of head space. Remove any air bubbles. Wipe the rims and seal the lids.

Process in a boiling water bath for 10 minutes. Store in a cool, dark place for up to a year.


Amy


Friday, September 2, 2011

Bread & Butter Pickles

From William Sonoma: The Art of Preserving, By Rick Field and Rebecca Courchesne, Makes 6 Pint Jars

6 pounds cucumbers, cut into 1/4 inch slices
1 yellow onion, cut into 1/4 inch slices
3 tablespoons kosher salt
6 ice cubes
4 cups cider vinegar
1/4 cup sugar
1 teaspoon turmeric
2 teaspoons mustard seeds
1 teaspoon celery seeds
1/2 teaspoon red pepper flakes

In a large bowl, combine the cucumbers and onion. Add 1 tablespoon of the salt and the ice cubes. Refrigerate for 3 to 4 hours. Remove the excess liquid, rinse and set aside to drain well.

Sterilize and prepare 6 pint jars.

In a large saucepan, combine the vinegar, sugar, turmeric and remaining 2 tablespoons of salt. Add 1-1/2 cups of water and bring to a boil. Stir to dissolve the salt.

To the cucumbers and onions, add the mustard seed, celery seed and red pepper flakes. Stir to coat the cucumbers in the spices. Pack the cucumber mixture into the jars as tightly as possible, leaving a 1/2 inch air space.

Ladle the hot brine into the jars, covering the cucumbers but leaving the 1/2 inch of headspace. Remove any air bubbles. Wipe the rims and seal the lids.

Process in a boiling water bath for 7 minutes. Let the jars rest for 2 weeks.

Store in a cool, dark place for up to a year.


Amy

Tuesday, August 30, 2011

In the Garden: Week 16


We are now at that fantastic time of year when harvesting from the garden is a daily occurrence. 

Despite Dave trying to mow the plants down earlier this year, I manage to get a small crop of soy beans. I never believed I would actually eat edamame right out of my garden!

Soy Beans

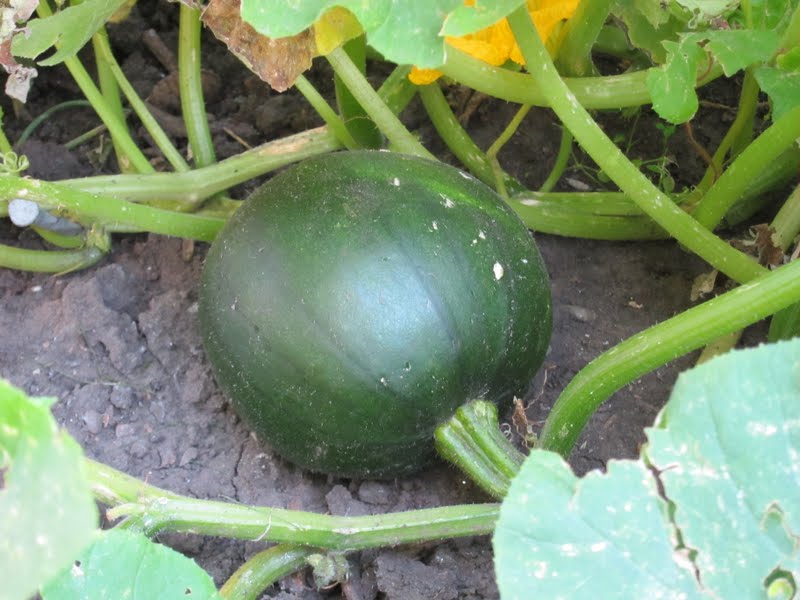
 I am also quite happy to have four perfect pumpkins growing bigger every day.

Pumpkin

Pumpkins

 Still patiently waiting on the brussel sprouts...

Brussel Sprouts

Amy

Sunday, August 7, 2011

In the Garden: Week 12

Yup, I managed to neglect the garden for another three weeks... and the result: a completely overgrown patch of weeds and greens.


I finally buckled down this weekend, plugged all the weeds and greens, re-seeded a fresh batch of greens and voila!


Our compost bin is now overflowing and our freezer is well stocked with kale and mustard greens. Plus our fridge is well stocked with lettuce, beets, carrots, tomatoes and zucchini.

Beets
Tomatoes
Zucchini 
Zucchini
Beets, Carrots, Green Onions

Amy
Related Posts Plugin for WordPress, Blogger...